We’ll give you our top tips, recommend the best tools and products for the job, and help you find the most convenient and efficient way to dry your short hair, however little time you have to spare.
You’ll also find some helpful FAQs from our customer community at the end. Let’s dive in.
Step one: Preparing your hair (checklist)
Benjamin Franklin once said "By failing to prepare, you are preparing to fail". A bit dramatic, perhaps, for a post about drying hair, but a good tip nonetheless! Proper prep is arguably the most important part of any process, and this one is no different. Give yourself a head start with our handy prep checklist:
- If you have time, leave your hair to air dry for 20 minutes, if not, skip to the next step
- Pat your hair dry with a microfibre towel to absorb as much moisture as you can, but avoid roughly rubbing your hair as this can create unwanted frizz
- Gently remove any knots or tangles with a detangling brush
- If you like to use a styling product, now’s a good time to apply some mousse or volumising spray. Less is more! If your styling product is also a heat protector, skip the next step
- Apply some heat protection spray - this will act as a protective barrier and shield your hair from heat damage
- Use clips to section your hair into the top and bottom sections if it’s long enough
- Set your hairdryer to a medium heat, and attach the diffuser attachment if you have one
Before we jump into the blow drying itself, it’s helpful to know what type of hairdryer to use - not all hairdryers are created equal!
Step Two: Use a diffuser attachment
To tame frizz, enhance volume and accentuate your hair’s natural texture, a diffuser attachment can go a long way. Many modern hairdryers come with some kind of diffusing attachment, but for the best results we’d always recommend a cup or bowl diffuser (the big one that looks like a shower head). These work so well because they distribute the heat evenly, preventing damage, locking in natural moisture, and enhancing definition.

Turn on the blowdryer, and hover the diffuser attachment just above your hair (rather than pressing it against your head) to get a bit more control.
If your hair is a bit longer (bob-length), you can afford to get a bit closer to the scalp and focus the diffuser on the top of your head, followed by the ends. The goal here is to get even coverage.
Try to move on after 5-10 seconds spent on each section. You can also encourage curls by gently scrunching your hair with your fingers as you go.
Top tip: If your hairdryer has one, switch to the cool setting or ‘cool shot’ at the end to add some shine and lock in your style.
Take a look at our guide breaking down the different hairdyer attachments and when to use them.
Step Three: Finishing and Styling
After blow drying short hair, you have a few options for locking in your style and finishing the look. Gently scrunching the hair will work well for messy cropped hair or textured pixie cuts.
A small amount of lightweight matte clay can provide definition and lift, pushed through the hair and targeting the roots.
To 'fix' the style in place, you might also consider a flexible hold hairspray.
If you're after a sleeker, controlled look, you could use straighteners to shape the ends, or apply a smoothing cream to tame flyaway hairs.
For a comprehensive guide to styling short hair at home, check out our post How to Style Short Hair.
Blow Drying Short Hair FAQs
Is blow drying better than air drying for short hair?
Air drying means less heat damage, and less risk of overdrying your hair. However, it's not always convenient if you're in a hurry, or it's the dead of winter!
The style and shape of your hair can be a bit hard to predict when air drying too, you might end up with too much volume or not enough. If you use a wrap or a towel, your hair can also pick up some unwanted damp odours from the material.
When it comes to blow drying, it's faster, gives you more control over style and shape, and you can dial in the volume more easily. We recommend a mix of both if you have the time - air dry for 15-20 minutes before blow drying for styling.
Should you dry your roots or ends first?
We recommend drying roots first, then the ends. This will be quicker (the roots hold more moisture), and means you can give your hair more shape, lift and volume as you dry.
How do you dry short hair without frizz?
We've outlined a few anti-frizz techniques above, but to sum up:
- Pat, don't rub when towel drying
- Use a styling or conditioning product designed to combat frizz
- Dry your hair in sections
- Finish with cold air to seal in the style, shine and texture
How to get volume in short hair?
A healthy mix of product and technique can provide the volume you're after. Volumising shampoo and/or mousse can give you a head start, and might also help with heat protection.
Use a diffuser attachment when blow drying to accentuate natural volume and bounce.
The brush you use can make a difference too - a round brush can lift your hair from the roots to add more volume. Have a go at backcombing the crown area for some extra height.
Finally, avoid heavy products like wax or oils - even in small doses they can weigh down and flatten your hair.
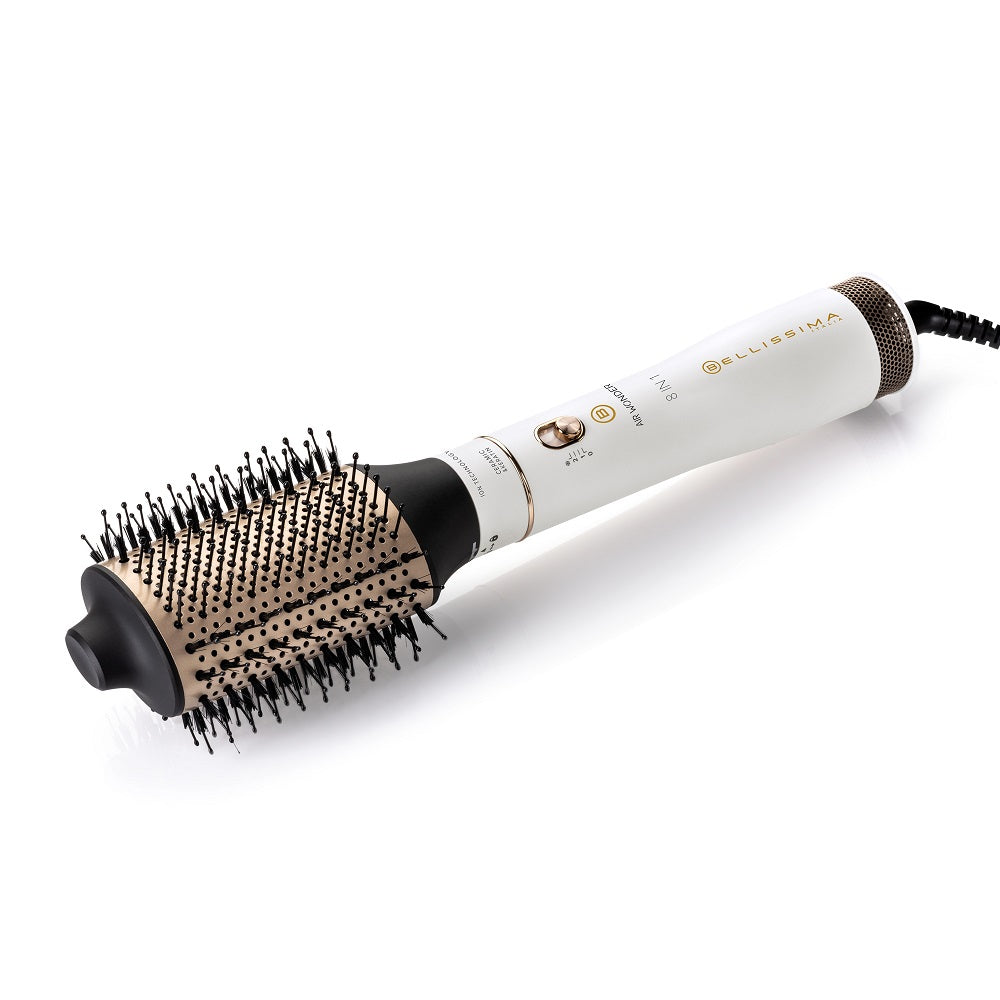
What is the best hairdryer / blowdryer for short hair?
The Bellissima Italia Ceramic Hair Dryer is the perfect choice for a professional blow dry at home, and comes with a ceramic diffuser out of the box. It gently and evenly dries the hair, and the cool shot button locks in your finished look. Find out more and check out the reviews and customer photos to learn why this is one of our most popular products.